This article shows you how to do this in Windows 7 and Vista. The procedure is slightly different in each system.
Windows 7
The following Windows Explorer window shows the Aero Glass transparency effect in Windows 7. You’ll notice that you can see the Windows logo on the desktop through the window’s border.
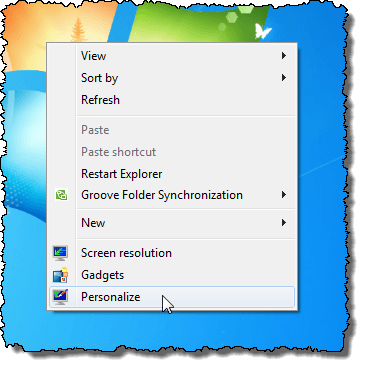
To disable the Aero Glass transparency in Windows 7, right-click on an empty area of the desktop and select Personalize from the popup menu.
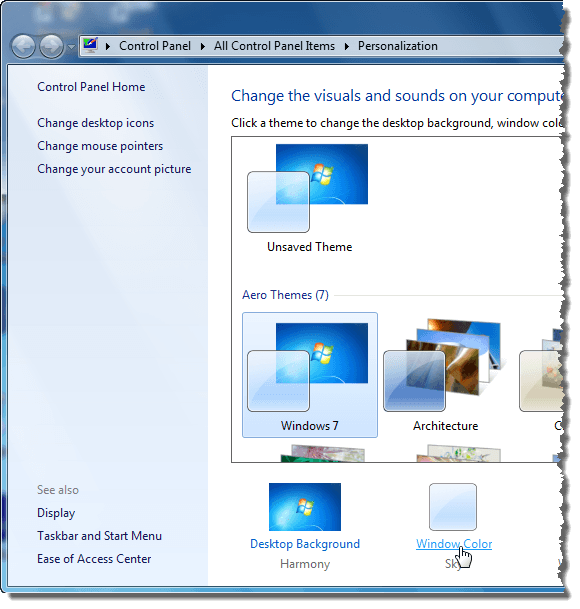
The Personalization screen on the Control Panel displays. Click the Window Color link below the themes.
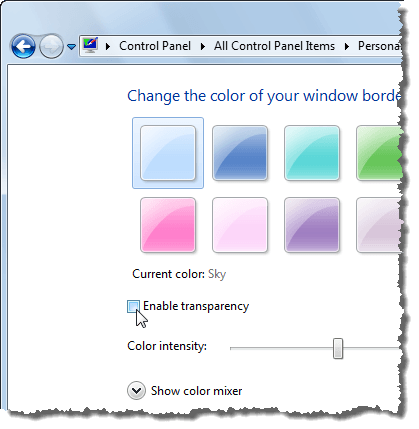
On the Window Color and Appearance screen, select the Enable transparency check box so there is NO check mark in the box.
Click Save changes to save the setting and close the Window Color and Appearance screen.
To close the Control Panel, click the X button in the upper, right corner of the window.
Now the borders on windows are not transparent.
Windows Vista
Here’s an example of a Windows Explorer window in Windows Vista with the Aero Glass transparency enabled.
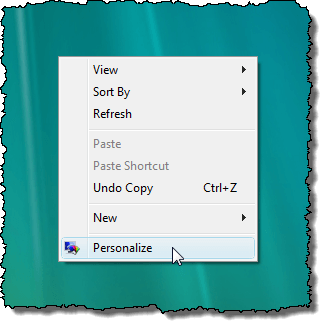
To disable the Aero Glass transparency in Windows Vista, right-click on an empty area of the desktop and select Personalize from the popup menu.
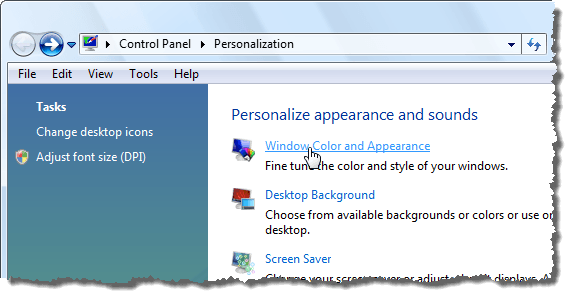
The Personalization screen on the Control Panel displays. Click the Window Color and Appearance link.
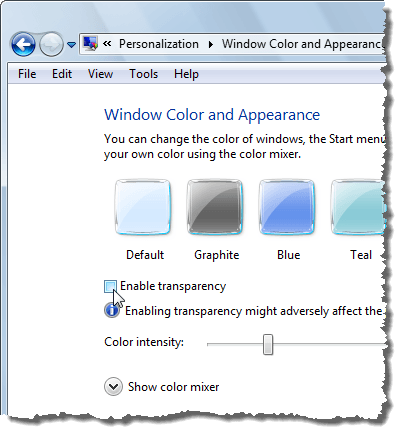
On the Window Color and Appearance screen, select the Enable transparency check box so there is NO check mark in the box.
Click OK to close the Window Color and Appearance screen.
To close the Control Panel, click the X button in the upper, right corner of the window.
The borders on windows are no longer transparent.
If you don’t mind giving up some of the fancy look of the Aero Glass feature, you can gain a little more performance out of your system. As we mentioned earlier, you still have access to the functional Aero features. by Lori Kaufman

