The troubleshooter may display the error if your computer’s network device driver is corrupt or outdated. Your network adapter’s power management settings can also cause this error. The problem is easy to fix, and we’re confident the solutions listed below should get you reconnected to the internet in no time.
Enable the Network Adapter
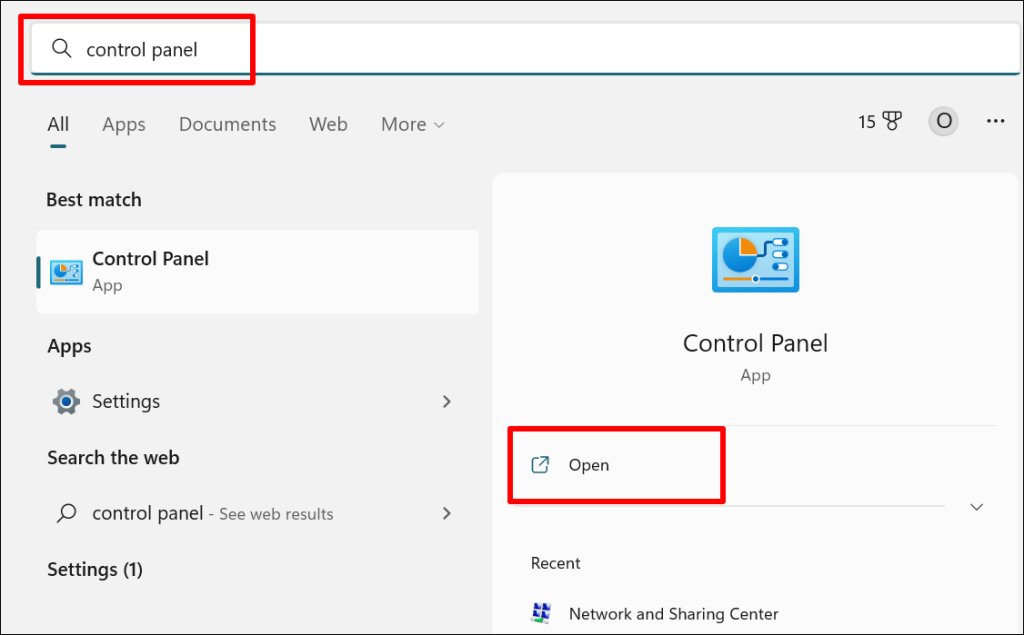
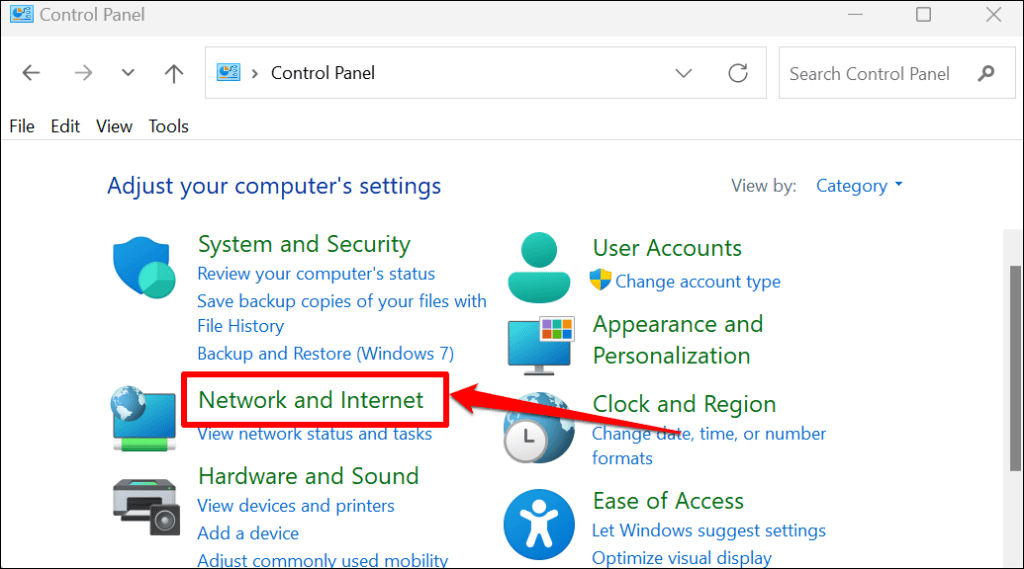
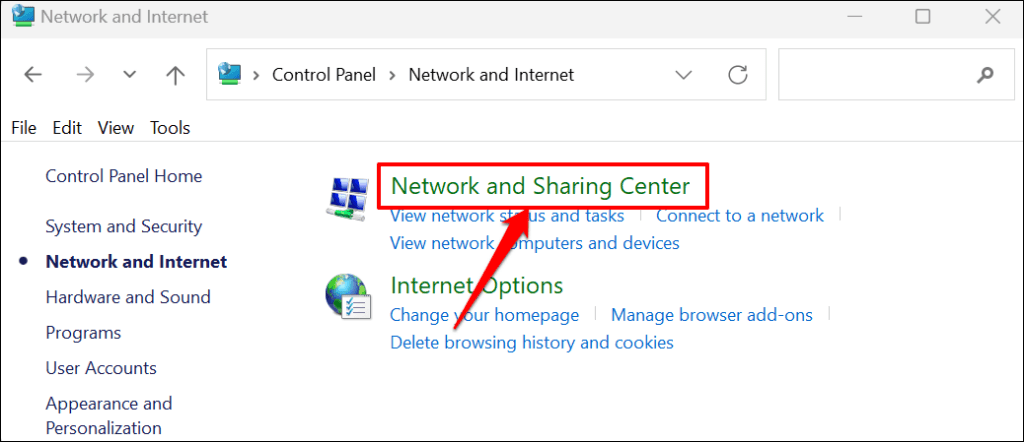
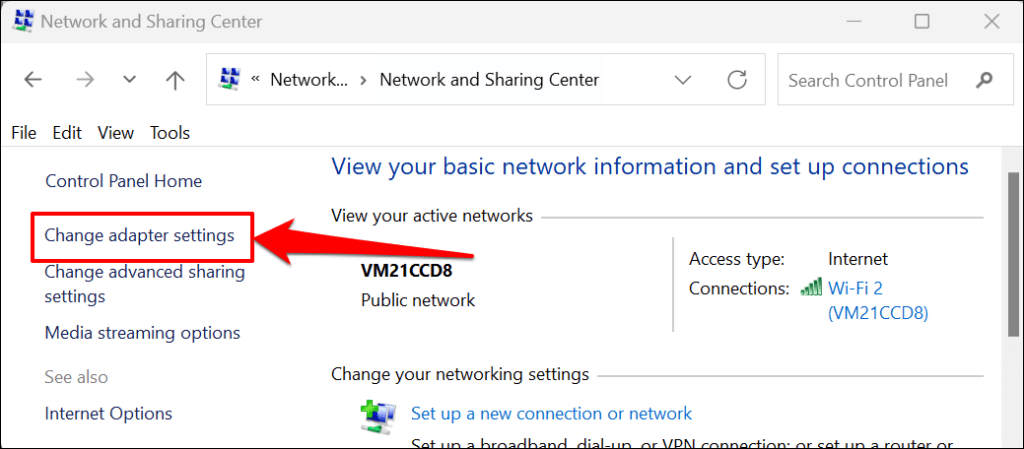
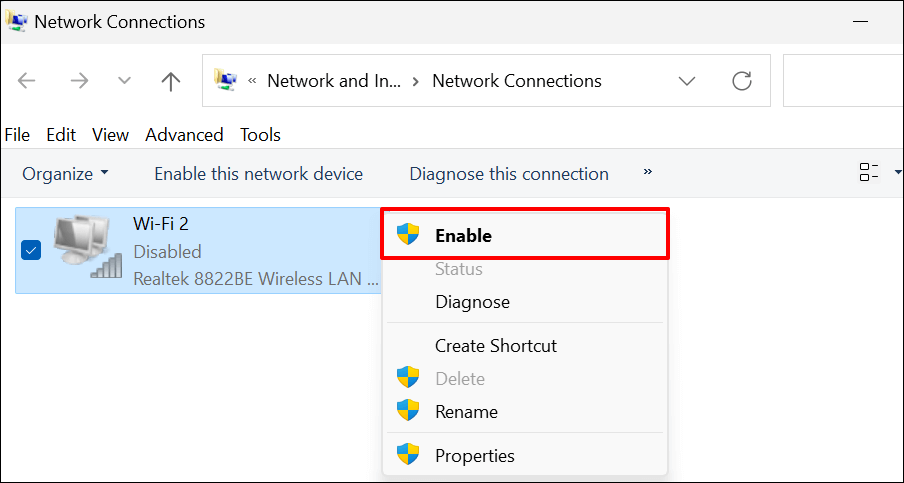
The Network troubleshooter may malfunction if your PC’s network adapter is disabled or turned off. Here’s how to check your network adapter status: Update your network driver if you keep getting the “Windows could not find a driver for your network adapter” error.
Update Your Network Driver
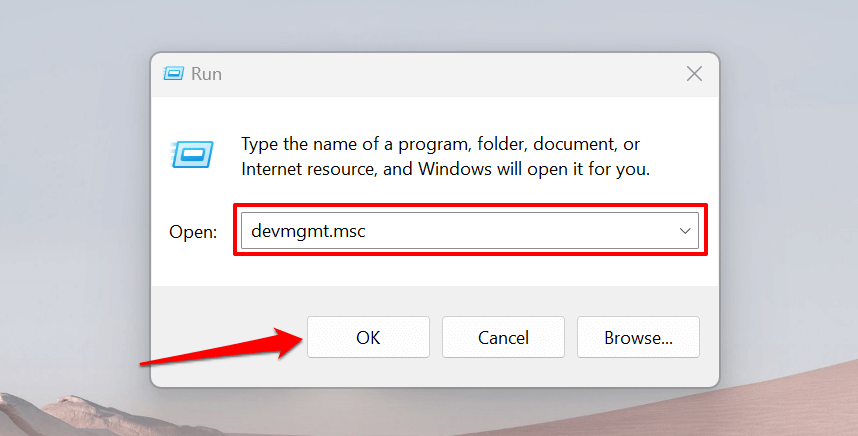
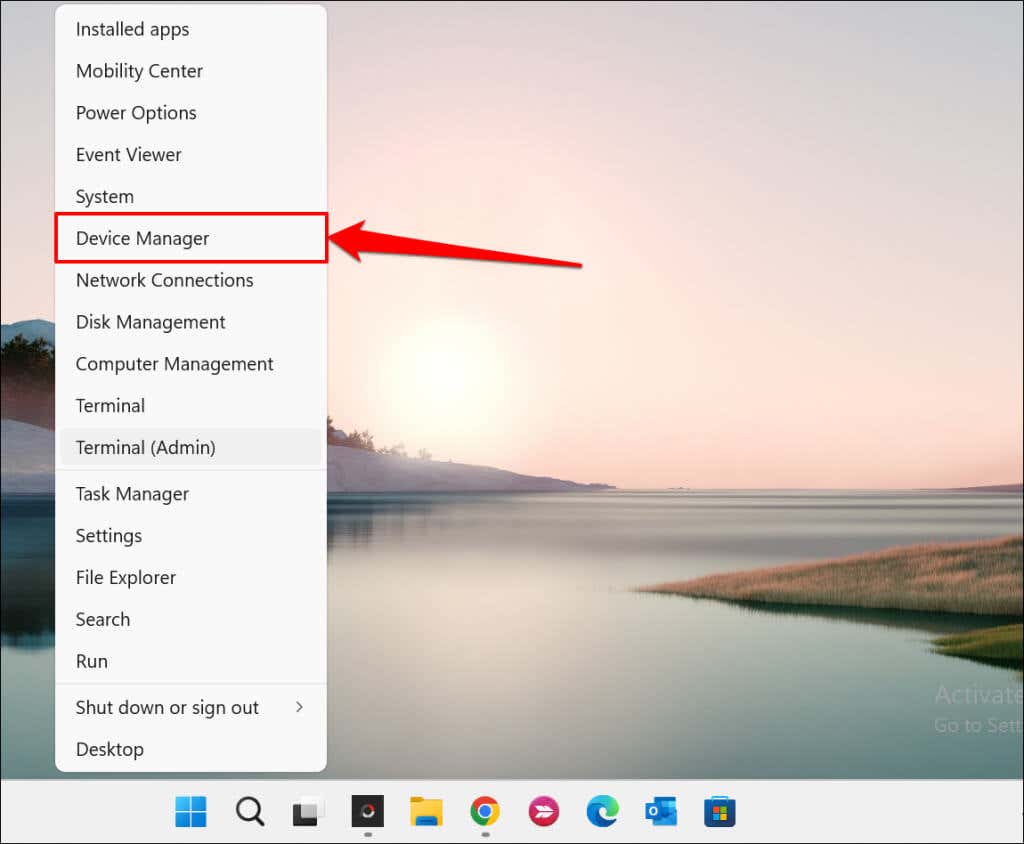
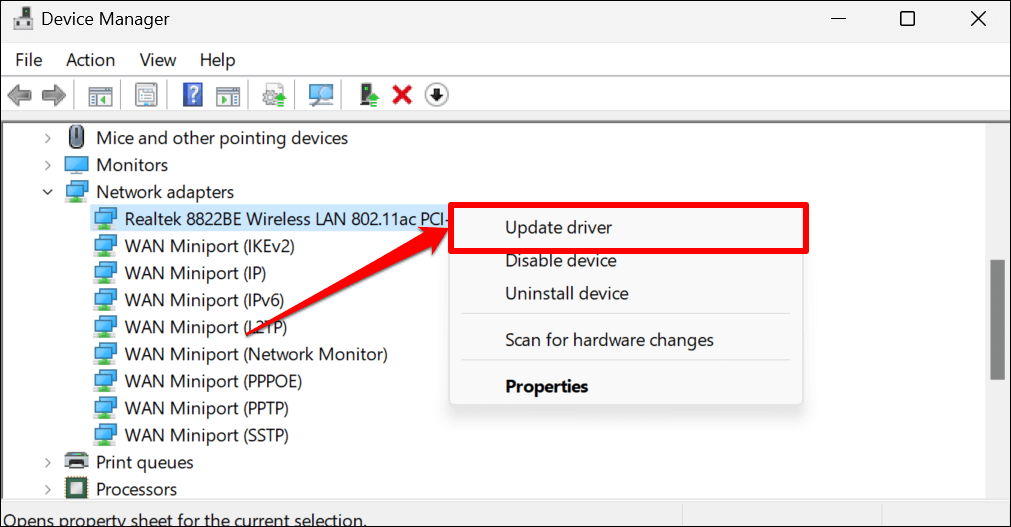
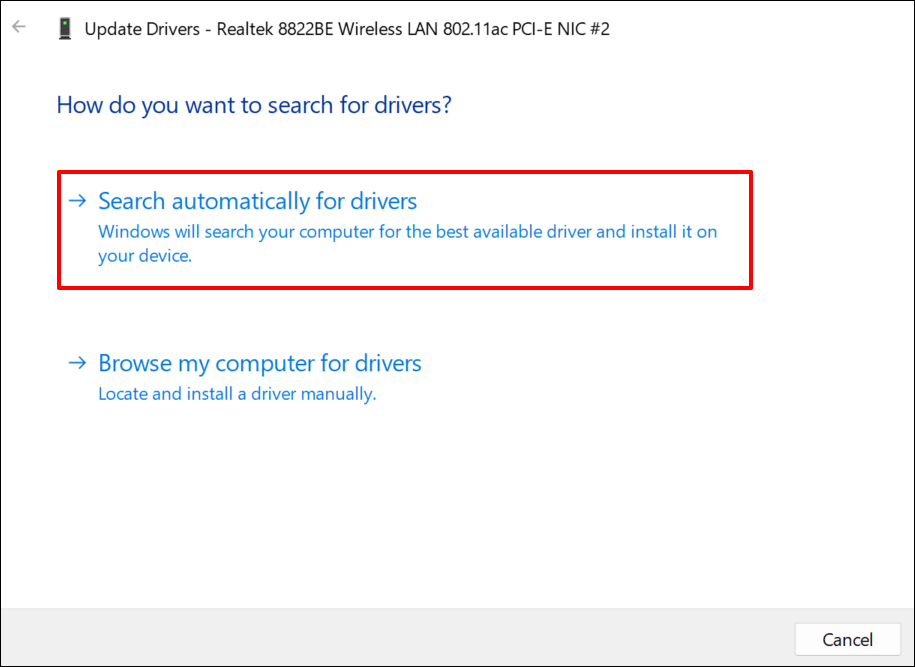
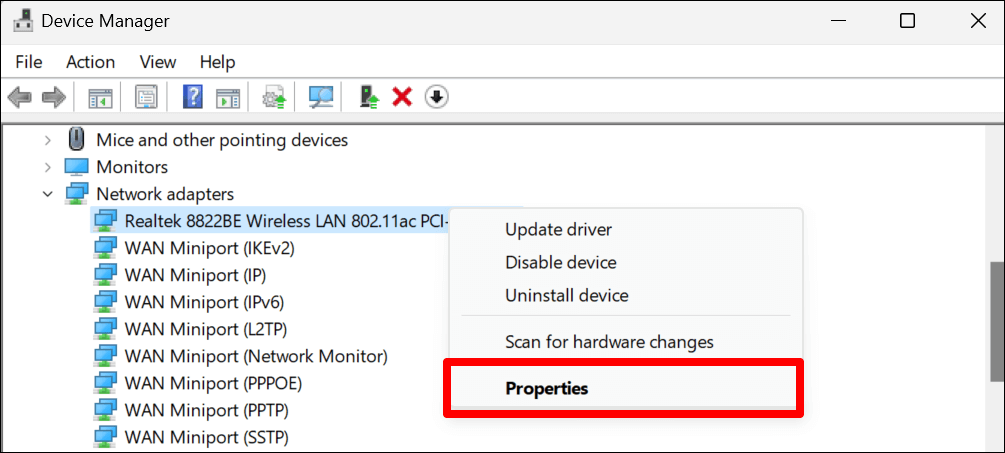
It’s always a good idea to have your device drivers up-to-date. Updating your PC’s network driver can improve connection performance and fix network adapter errors. Follow the steps below to update the network drivers on Windows 10 and Windows 11 computers. Alternatively, right-click the Windows icon (or press Windows key + X) and select Device Manager. Select Browse my computer for drivers to manually install a driver. You’ll find the latest version of your PC’s network adapter on the manufacturer’s website. Note: Not all driver software updates are stable and bug-free. If a network driver update worsens your PC’s connectivity, you should immediately roll back the driver to the previous/stable version.
Reinstall the Network Adapter Driver
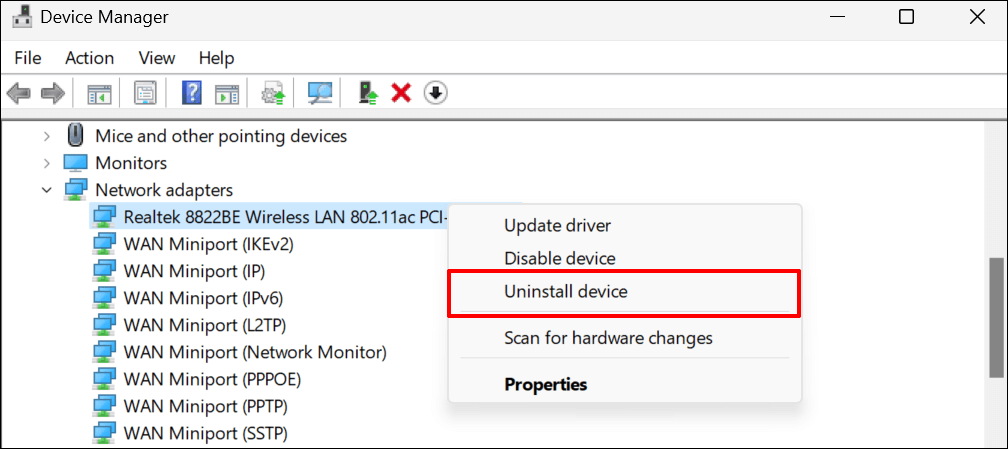
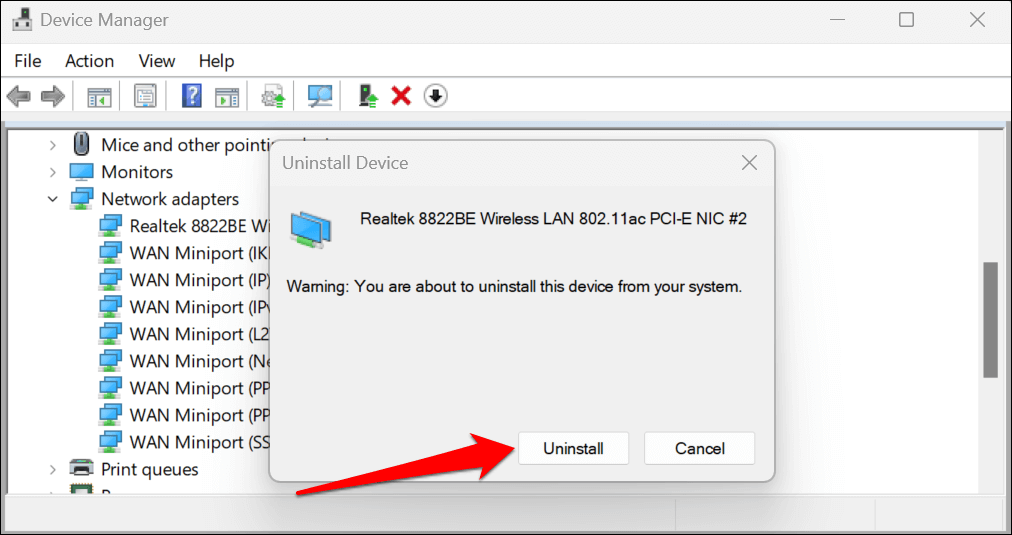
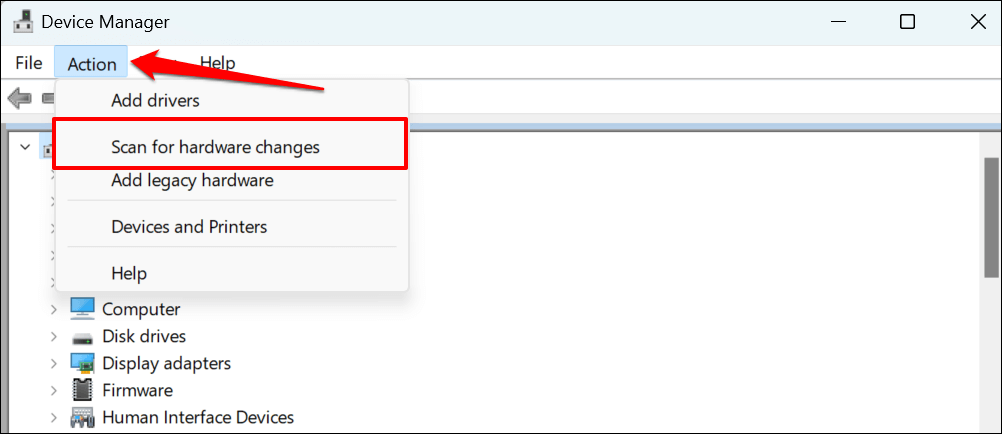
Uninstalling and reinstalling your network adapter driver might fix issues preventing Windows from detecting the device. If your network adapter’s driver is up-to-date, but Windows still won’t detect it, delete and reinstall it from scratch. Note: Uninstalling your network adapter’s driver will end active network connections and remove all saved networks from your computer. We recommend saving the passwords of important networks before reinstalling your network driver. Refer to this tutorial on viewing saved Wi-Fi passwords in Windows for more information. Device Manager will automatically reinstall the recently deleted network adapter driver. Run the network adapter troubleshooter again and check if that stops the issue.
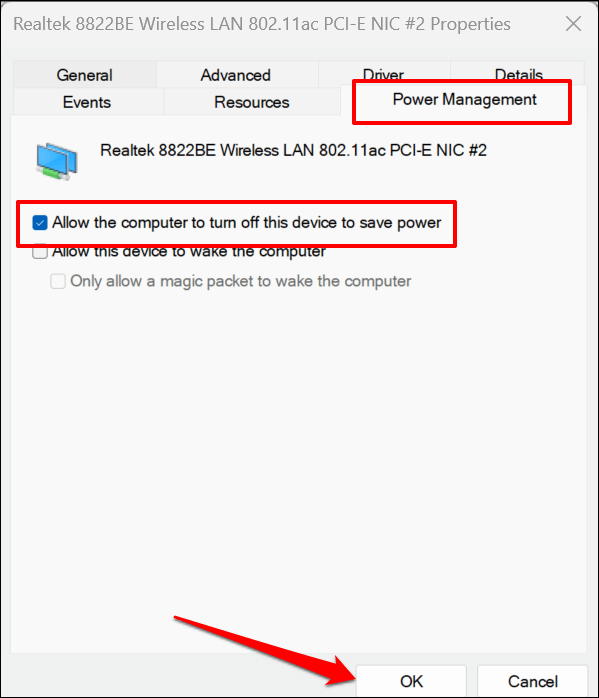
Change the Network Adapter Driver Power Management Settings
Windows sometimes pause some system devices and background processes to save power, especially on battery-powered devices like laptops.
Install Windows Updates
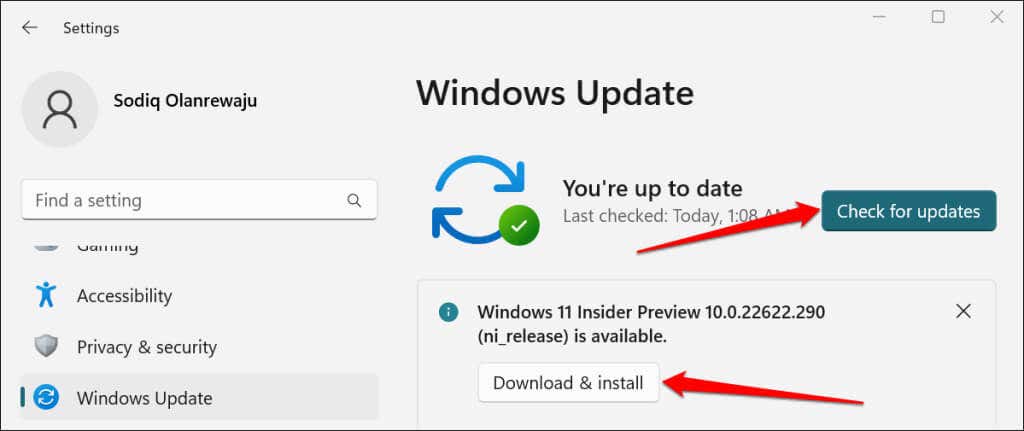
Windows updates ship bug fixes, latest driver versions, and performance improvements. Updating Windows could restore the communication between your PC’s operating system and network adapter.
In Windows 10, go to Settings > Update & Security > Windows Update > and select Check for updates. If your PC runs Windows 11, head to Settings > Windows Update and select Check for updates or Download & install.
Perform a System Restore
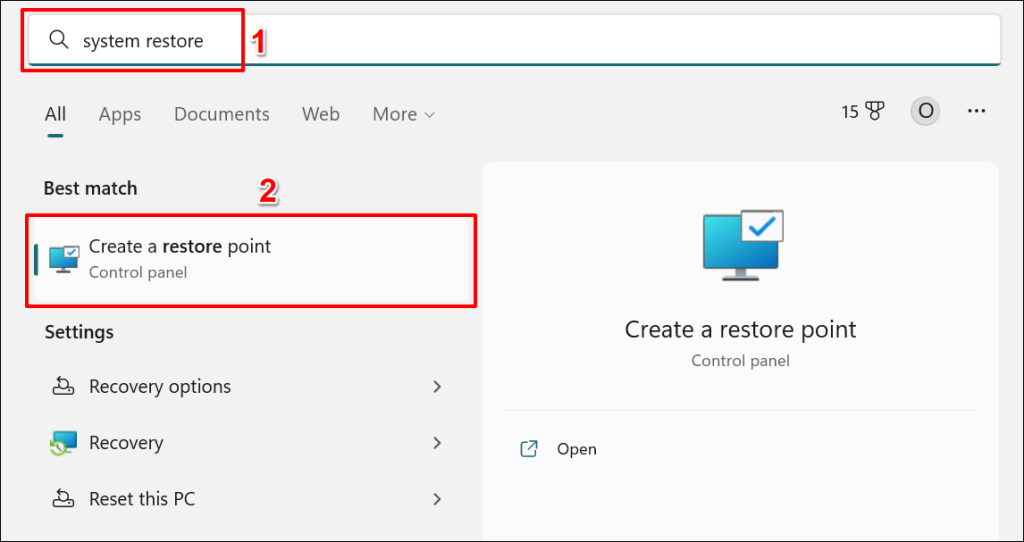
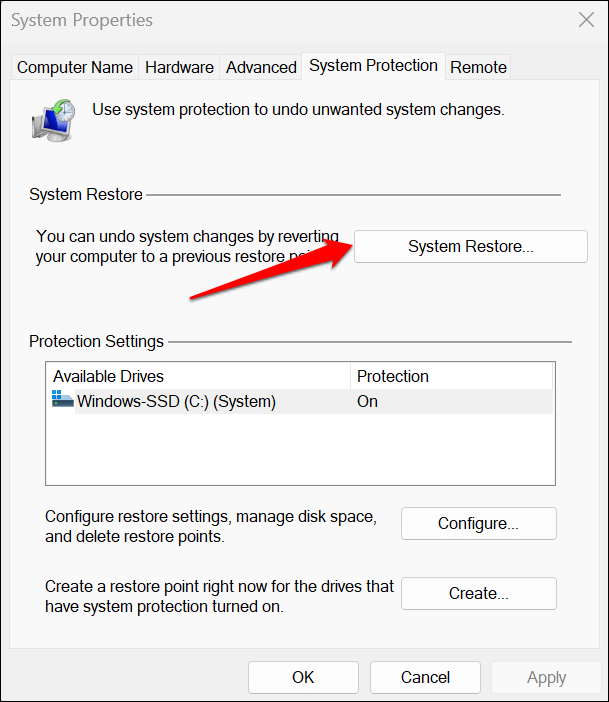
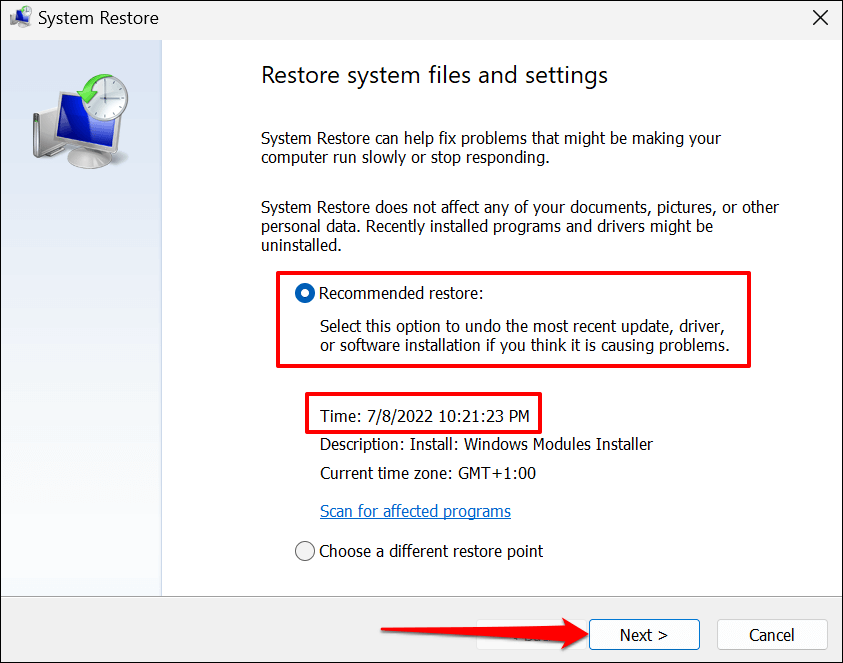
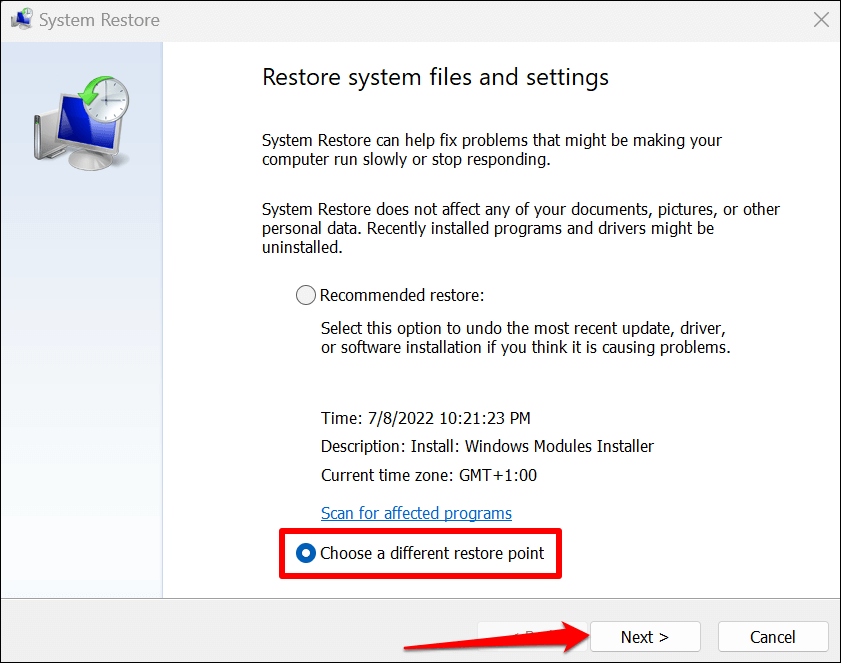
Take your computer back in time if the issue started recently and none of the fixes above resolve the problem. Running a system restore will remove recently installed programs or drivers that may be conflicting with your network adapter driver. System Protection must be enabled on your local disk to use the Windows System Restore feature. That allows Windows to automatically create periodic restore points making significant changes to your PC. For more information, refer to our tutorial on creating a restore point in Windows. Follow the steps below to restore your computer to an earlier point when Windows could detect its network adapter driver. The “Scan for affected programs” option allows you to see what programs and drivers get deleted and restored. Select Choose a different restore point to pick an older system restore point and move your PC back in time. Your computer will reboot when the system restore is complete. Windows should now detect your network adapter driver when you run the troubleshooter.
Help Windows Find Your Network Driver
Reset Windows network settings if the Network troubleshooter still says, “Windows could not find a driver for your network adapter.” Contact your PC manufacturer or report the problem to Microsoft Support if nothing changes.
